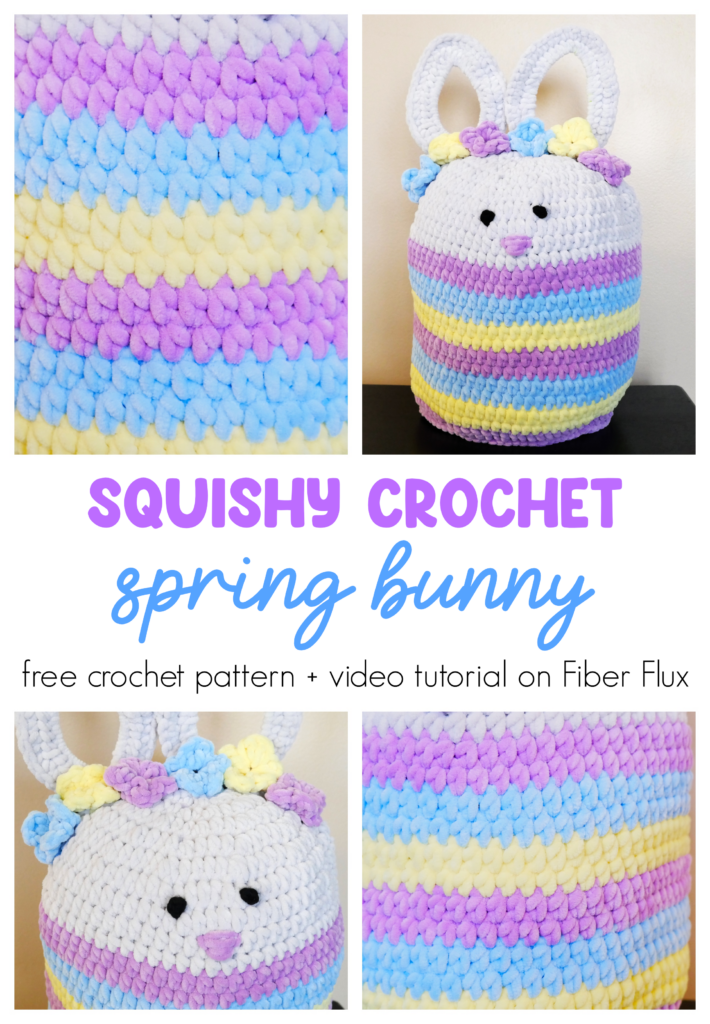
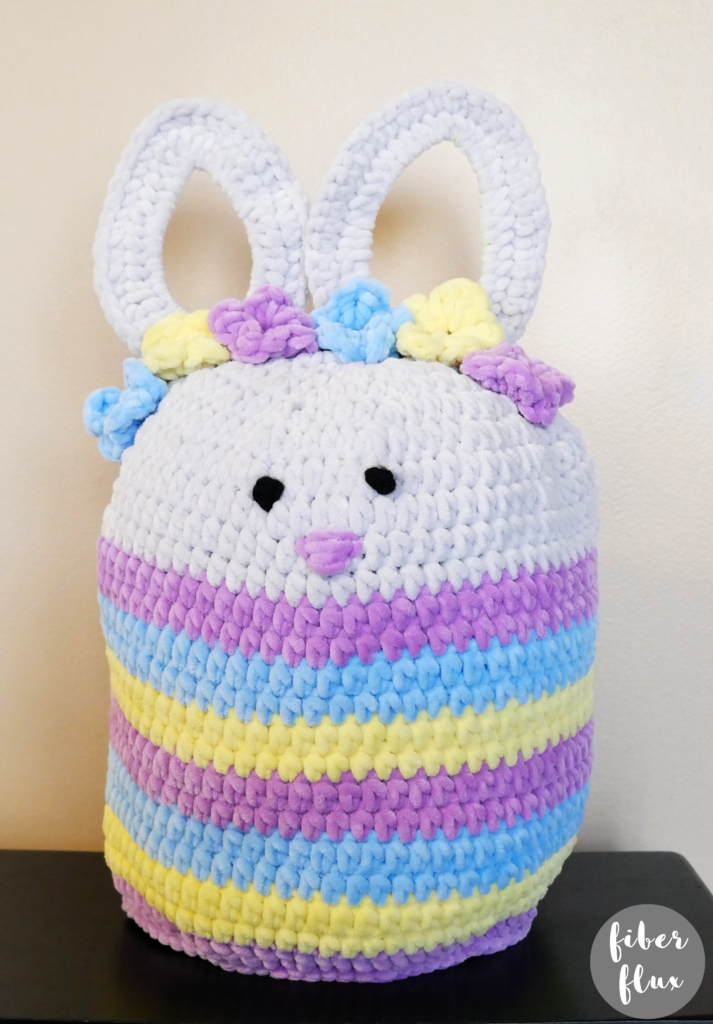
The Squishy Crochet Spring Bunny is a lovely and super fun bunny perfect for Easter and spring! This bunny is happy and perfectly huggable and has a fun Easter egg style striped body, cute ears, and a beautiful flower crown too! This is a fabulous project for popping into an Easter basket, part of your spring decor, and even a fun throw pillow too!
👉Get the ad free pattern PDF from my shop here!👈
Watch a full video tutorial on how to make the Squishy Crochet Spring Bunny:
Love video tutorials? Subscribe to the Fiber Flux YouTube channel for more stitchy fun!
Materials:
- K (6.5 mm) crochet hook
- 350 yards of super bulky/#6 weight yarn (I used 4 colors of Toucan from Hobbii in the “Pastel Yellow” “Sky Blue” “Light Purple” and “Cloud” I used a full ball of the cloud, almost a ball of the purple, and about half each of the yellow and blue)
- Scraps of yarn to embroider eyes and nose ( I used super bulky weight yarn in black for the eyes and left over purple from the bunny for the nose)
- Yarn/tapestry needle
- Scissors
- Measuring Tape
- Polyfill/Fiberfill
- 2 Pipe Cleaners (the longer ones, 11-12 inches)
Looking for awesome yarn and hooks for this project? Get them all and lots more here!
Sizing:
- Body circumference is 29 inches
- Bottom to top of head is 11 inches tall
- Total height is 16 inches tall
- Each ear is 5 inches tall
- Flowers are 2.5 inches wide
Squishy Crochet Spring Bunny Pattern Notes:
- If you want your bunny to be taller or shorter, simply work more/less rounds of the striped section.
- Not into embroidery? Try making button eyes and nose, or even glue some felt shapes for the face!
- If you’re having trouble getting the ears to stand up, add more stitches to the front and back of the base of each ear. This will add some strong reinforcement
- Love free Easter patterns? Get more free crochet Easter patterns here!
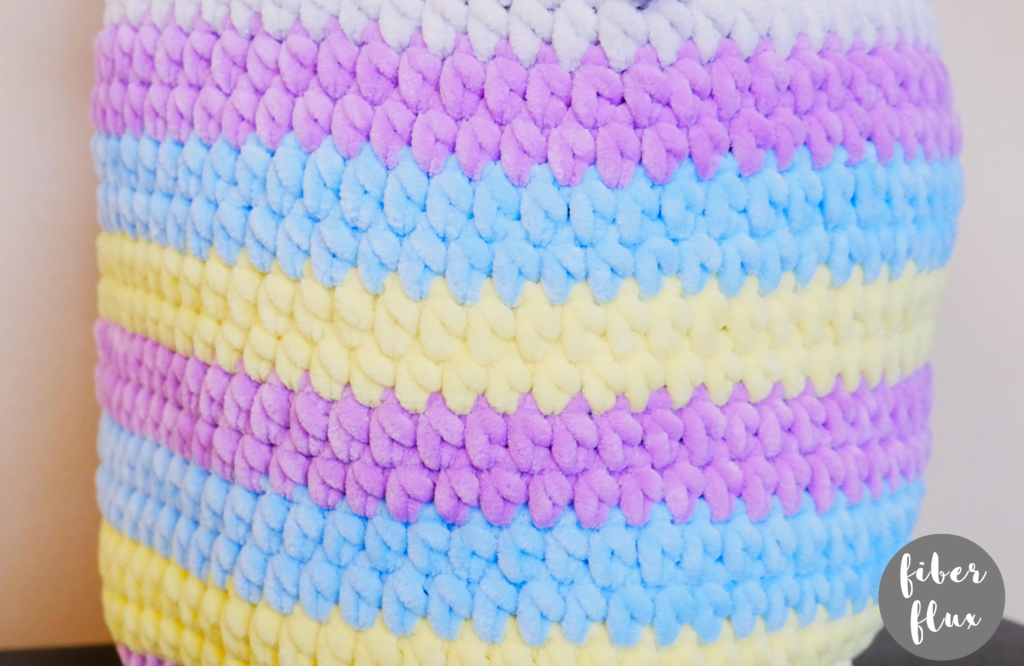
Colors Used For Each Round:
- Rounds 1-5: Purple
- Rounds 6-7: Yellow
- Rounds 8-9: Blue
- Rounds 10-11: Purple
- Rounds 12-13: Yellow
- Rounds 14-15: Blue
- Rounds 16-17: Purple
- Rounds 18-26: Gray
Bunny Body & Head:
The Base:
- Ch 4 and join in the ch furthest from the hook with a slip stitch to create a ring.
- Round 1 (purple yarn): ch 3, then work 11 dc into the center of the ring. Join the close the round with a slip stitch.
- Round 2 (purple yarn): ch 3, then *work a dc into the first stitch, then work 2 dc into the next stitch. Repeat from * around. Join to close the round with a slip stitch in the topmost chain.
- Round 3 (purple yarn): ch 3, then *work 2 dc into the first stitch, and in each stitch around. Repeat from * around. Join to close the round with a slip stitch in the topmost chain.
- Round 4 (purple yarn): Repeat round 3.
- Round 5 (purple yarn): Ch 3, then work a bpdc (back post double crochet) in each stitch around. Join to close the round with a slip stitch in the topmost chain.
The Striped Body:
- Rounds 6-21 (worked in alternating colors to create stripes-I did two rounds of each color, the last four rounds in gray): ch 2, then work a hdc (half double crochet) in each stitch around. Join to close the round with a slip stitch in the topmost chain.
Head Shaping:
- Round 22: (worked in gray yarn): ch 2, then *work a hdc into each of the next 4 stitches, then a hdc2tog over the next two stitches. (see the video tutorial above if unfamiliar with this stitch!)
- Round 23: (worked in gray yarn): ch 2, then *work a hdc into each of the next 3 stitches, then a hdc2tog over the next two stitches.
- Round 24: (worked in gray yarn): ch 2, then *work a hdc into each of the next 2 stitches, then a hdc2tog over the next two stitches.
- Round 25: (worked in gray yarn): ch 2, then *work a hdc into the next stitch, then a hdc2tog over the next two stitches.
- Round 26: (worked in gray yarn): ch 2, then *work a hdc2tog around the whole round this time.
- Fasten off leaving a long tail (you will have a small opening). Leave it open for now and move down to the Bunny Face section.
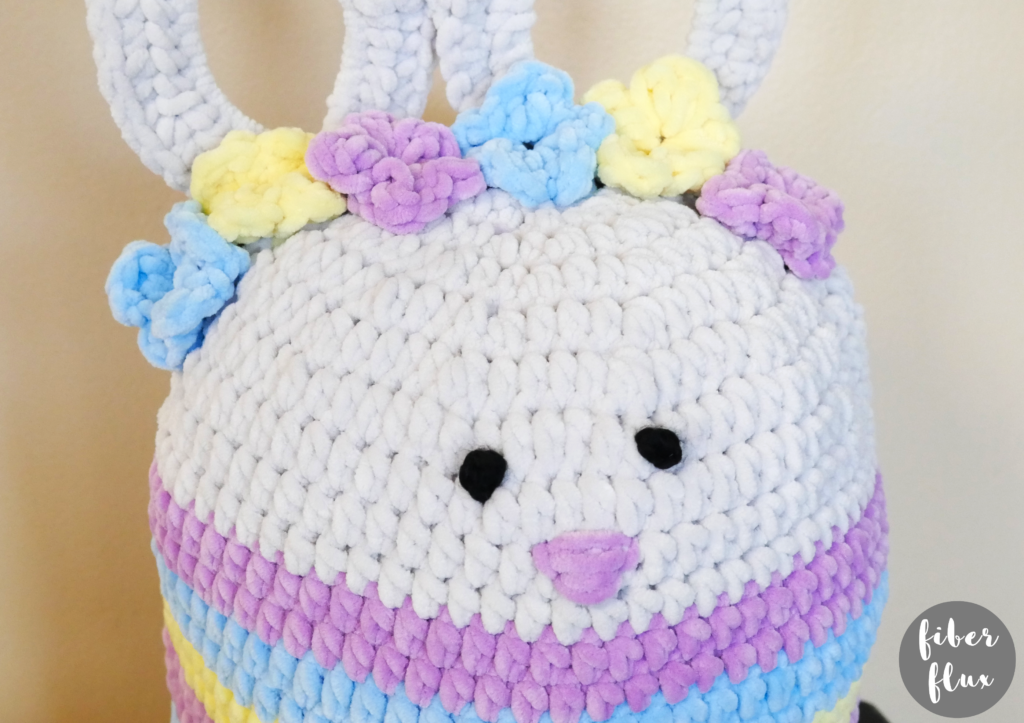
Bunny Face:
- With scrap yarn, embroider a nose as shown (I used some leftover purple yarn). I just did a few horizontal stitches, then a vertical one on each side.
- Embroider the eyes. I did just two simple french knots with some black super bulky yarn. If you’ve never done a french knot, check out my tutorial and video here!
Bunny Ears:
- (Worked in the gray yarn)
- Make two.
- Tie yarn onto the end of one of the pipe cleaners.
- Chain 2 then work 48 hdc across the pipe cleaner.
- Ch 1 and turn. Work a sc into each stitch across.
- Fasten off leaving a long tail and bend into a bunny ear shape.
- You may want to fold the ends of the pipe cleaners inward to keep the stitches from falling off the edge.
- Set aside for both ears for now.

Flowers:
- Make 6 (2 of each color).
- Ch 5 and join in the ch furthest from the hook with a slip stitch to create a ring.
- *Work (3 dc, sl st) into the center of the ring. Repeat five times for five petals or six times for six petals. Fasten off, leaving a long tail for seaming later.
- Repeat to create a flower crown–I did two purple, two yellow, and two blue.
Finishing & Assembly:
- Stuff the bunny until it is full. For best results, add the filling in small amounts, a little at a time instead of one large clump. It will give you a lot more control and less of a “lumpy” look.
- Seam the top closed–with a tapestry/yarn needle, weave in and out along the edge. Gently pull closed to cinch closed and secure with a strong knot or two.
- Shape then sew ears to top of head.
- Sew Flowers as shown in a row across the front of the ears.
- If your ears are a bit wiggly, you may need to add some some stitches across the back of them to reinforce.
- Stuff and/or weave in all ends and you’re finished!
Looking for more crochet Easter patterns? Check out my crochet Easter pattern library!