
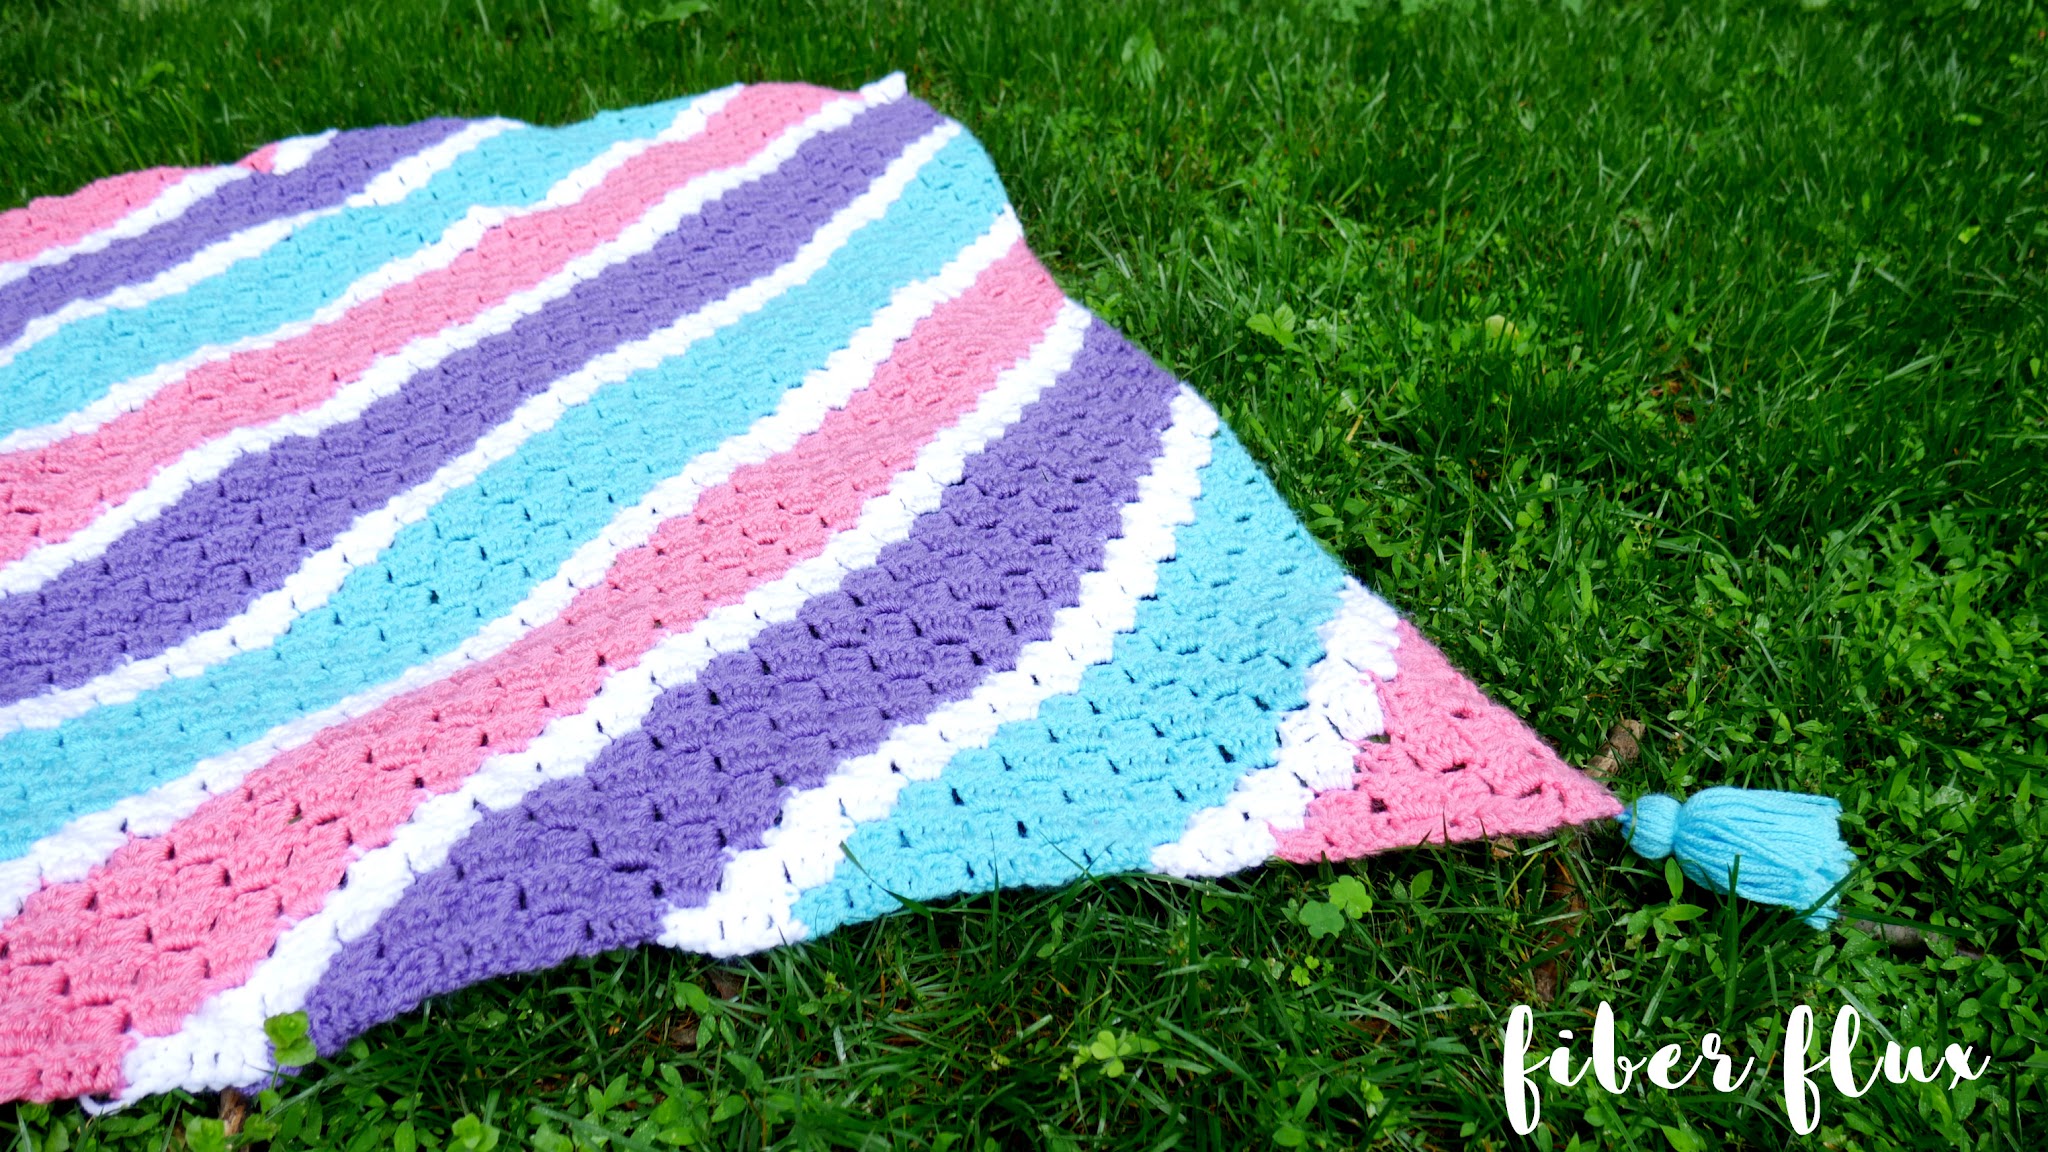
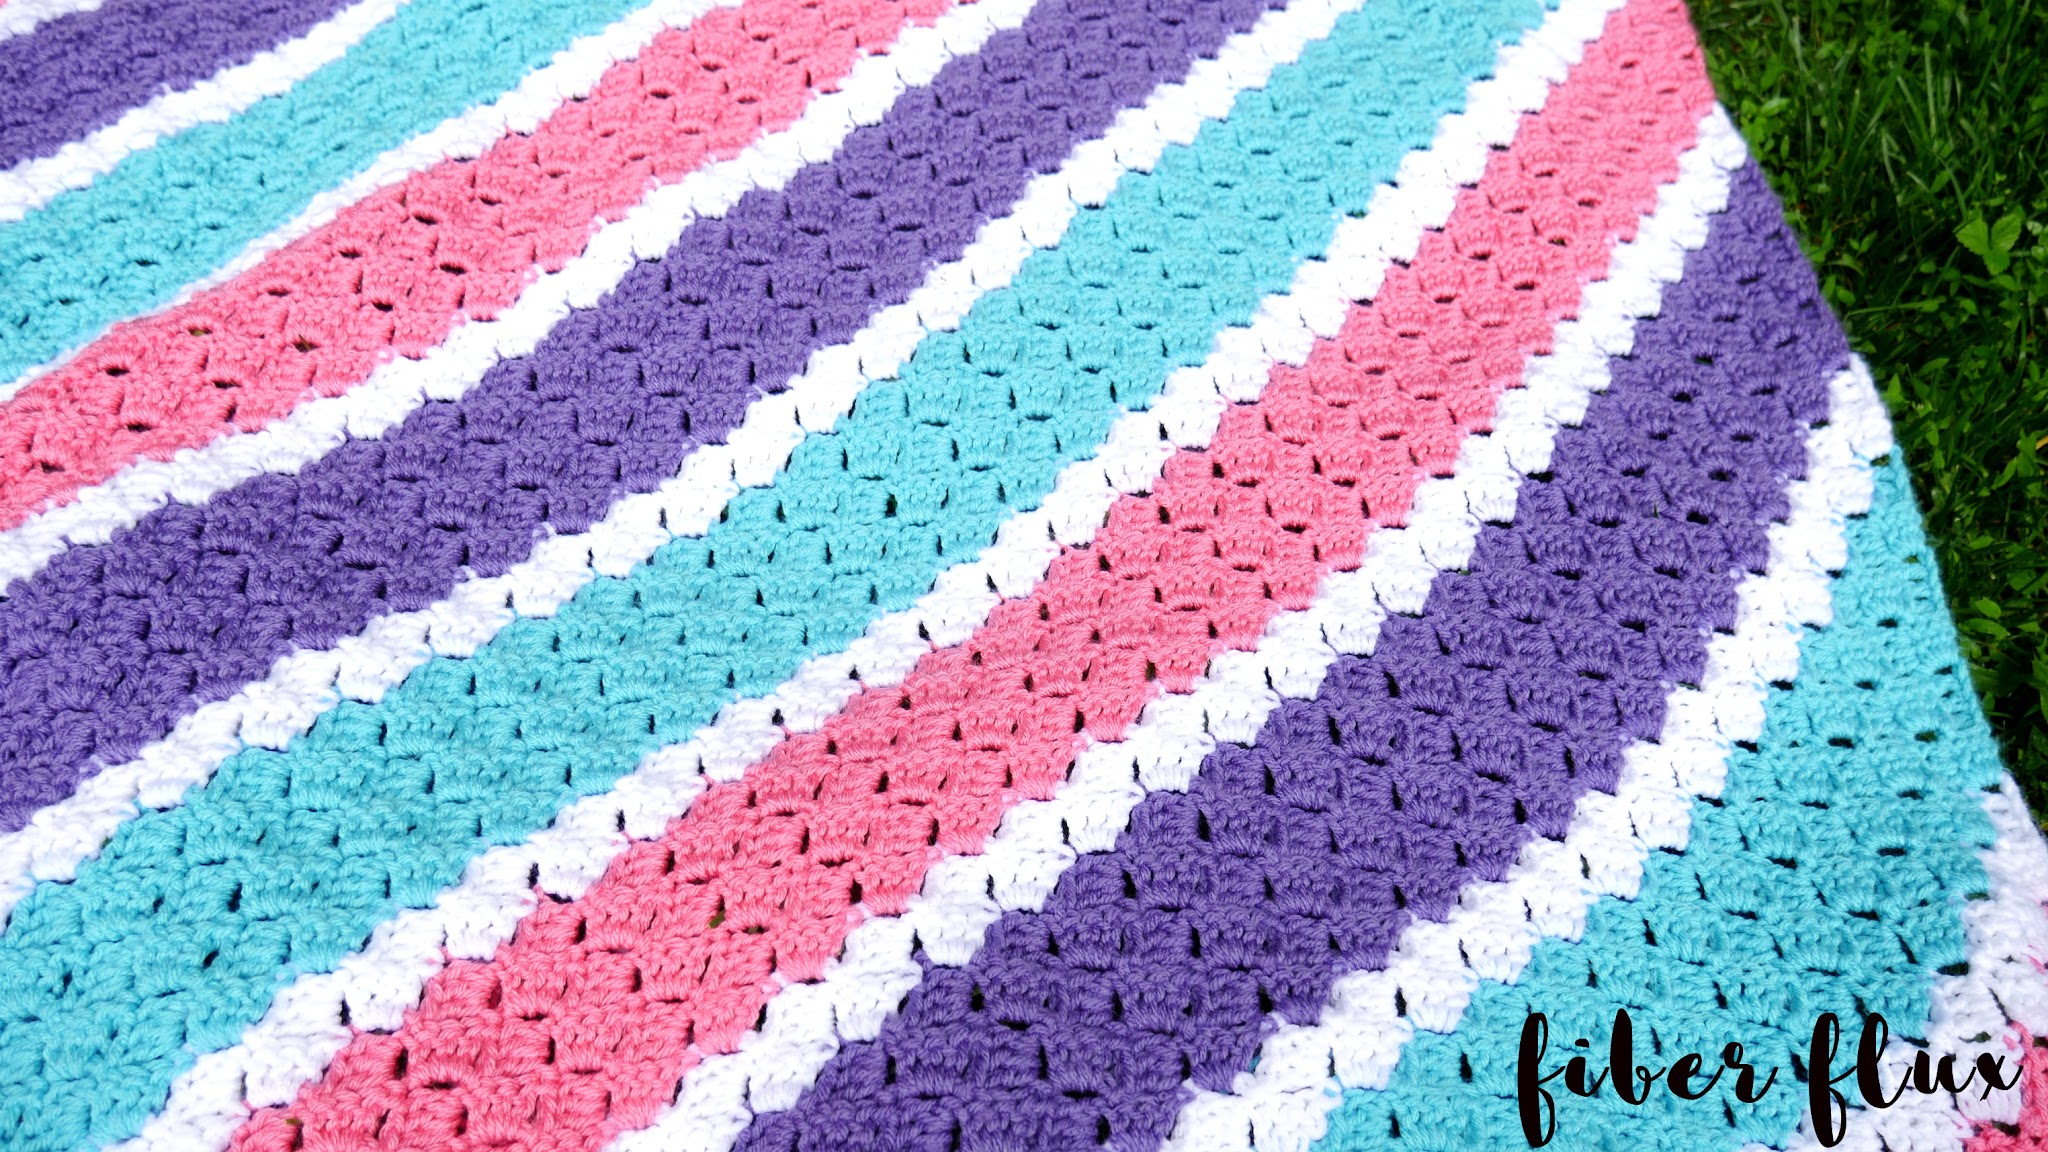
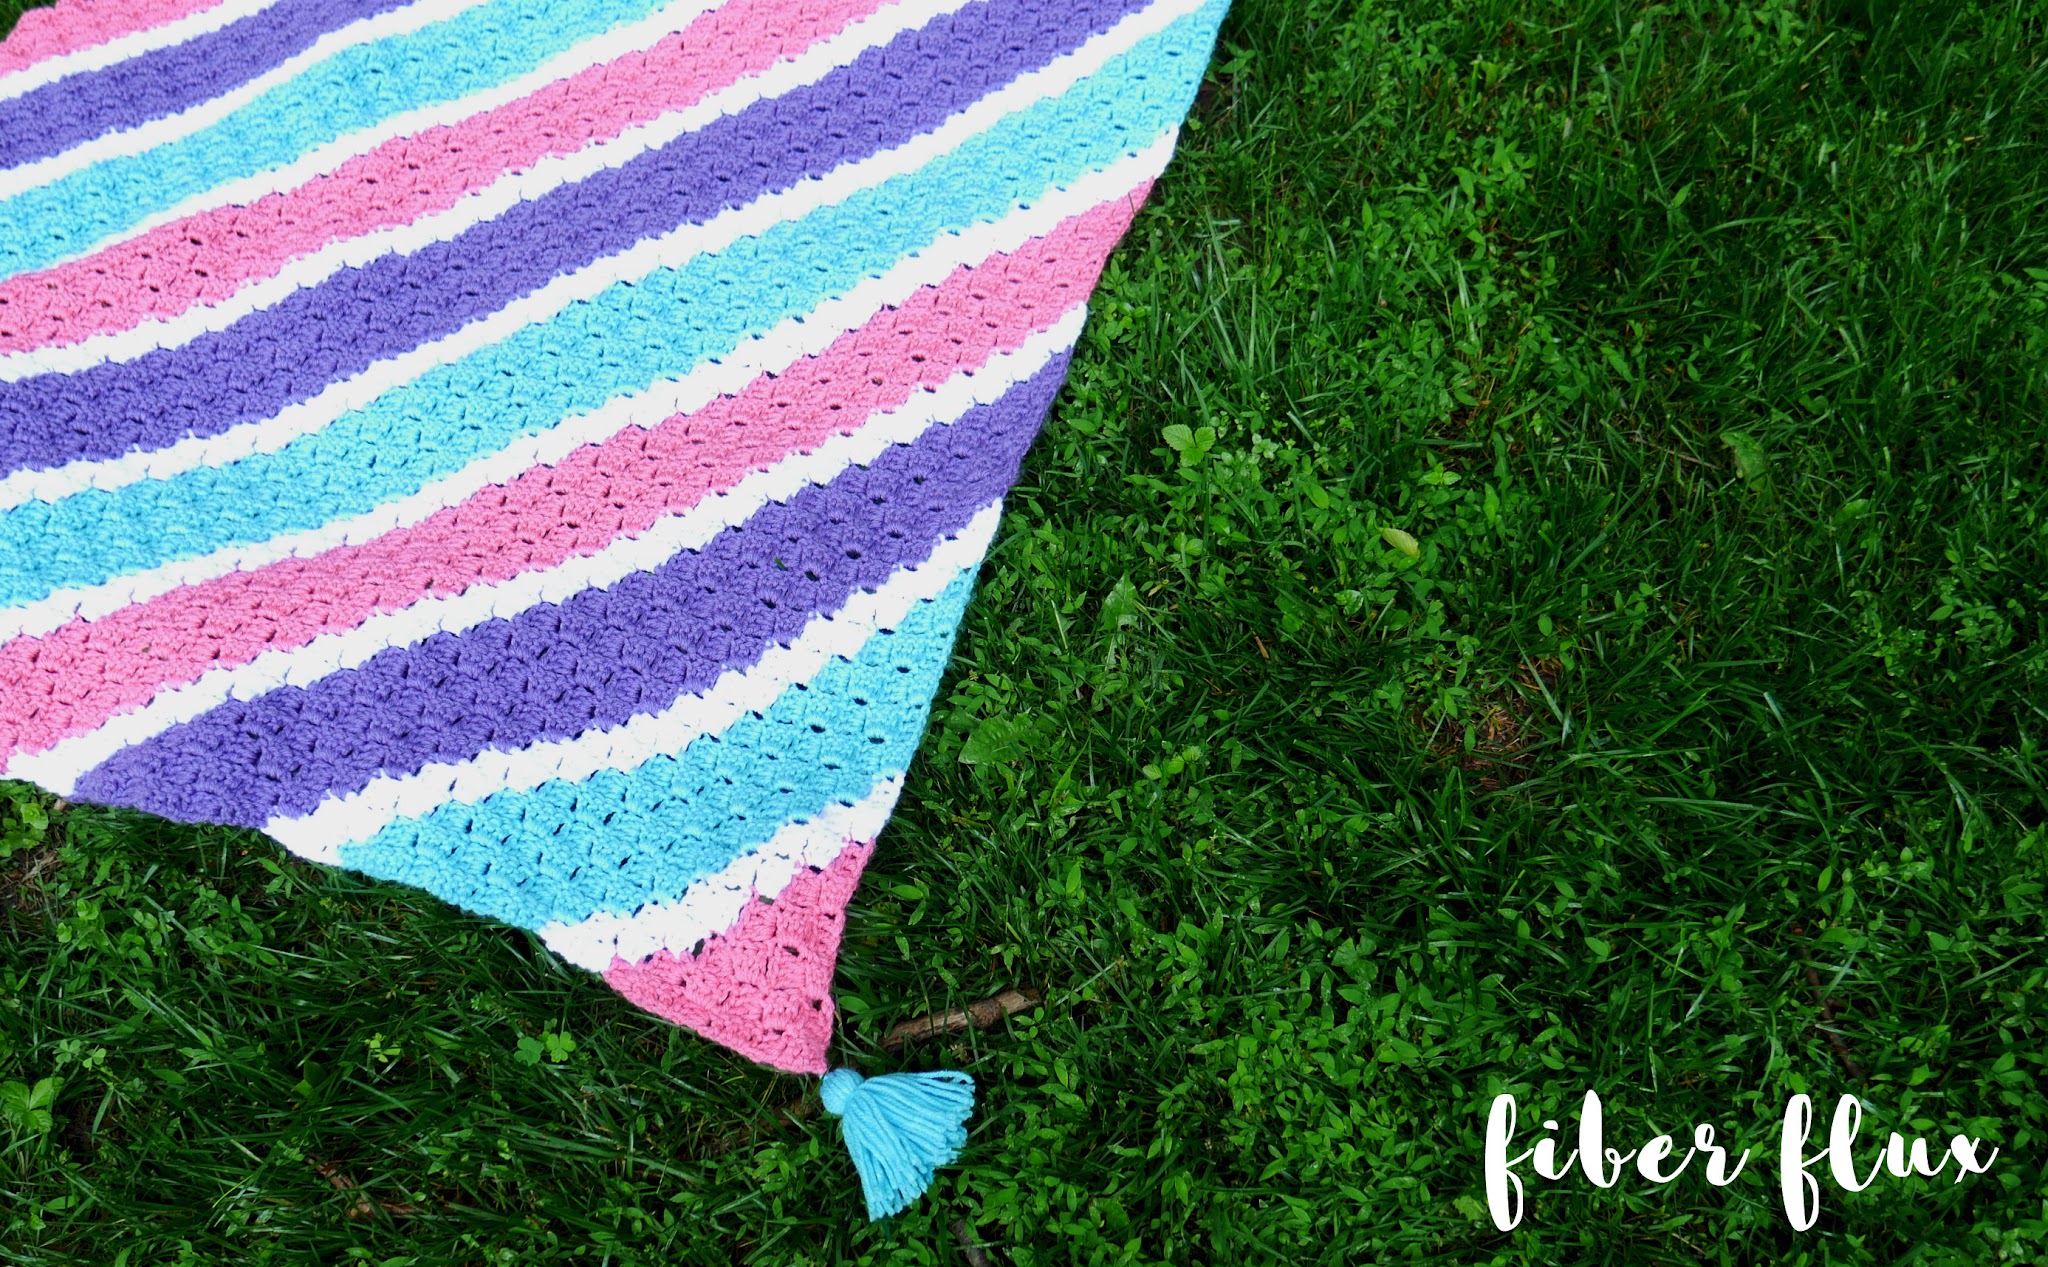
The Springy Stripes C2C Crochet Blanket is a gorgeous and super springy crochet blanket worked up in the corner to corner technique. It has happy stripes of color, separated by crisp white stripes, giving it a happy and fresh feel. Add some optional tassels for a finishing touch!
Materials:
- 6.5 mm K crochet hook
- Size 4 medium weight yarn of your choice, approximately 2200-2500 yards (I’ll be using 2 balls of Red Heart Baby Hugs Medium in “Lilac” 2 balls of Red Heart Baby Hugs Medium in “Sky” 2 balls of Red Heart Baby Hugs Medium in “Happy” and 2 balls of Red Heart With Love in “White” I also got an extra 1 ball of the “happy” colorway yarn to add tassels too.
- Note: if you need to substitute yarn, just look for a yarn that is a 4/medium on the yarn weight scale and recommends the 6.5 mm K hook.
- Tapestry Needle
- Scissors
- Tape Measure
Looking for awesome yarn and hooks for this project? Get them all and lots more here!
Sizing:
- 50 inches tall
- 50 inches wide.
- The blanket shown is a large baby blanket/kid sized throw. The blanket height and width can be adjusted by simply working more or less rows of the pattern. The first half of the blanket you’ll increase the square and the second half we’ll decrease, using roughly half of the yarn for the first half of the square.
- If you want to make your blanket larger, more yarn might be needed. Check out the chart for common blanket sizes:
Pattern Notes:
- To make your blanket bigger simply work part 1 for more rows, then switch to the decrease (part 2) after that.
- You can work your stripes how you like…I did mine in this sequence:
- 6 rows “Happy” (pink)
- 2 rows “White”
- 6 rows “Sky” (aqua blue)
- 2 rows “White”
- 6 rows “Lilac” (purple)
- 2 rows “White”
- Then just repeat throughout the whole blanket!
Get the ad-free crochet pattern PDF in my Etsy shop and my Ravelry shop!

Springy Stripes C2C Crochet Blanket Pattern:
Part One: The Blanket Increase
- Step 1: Ch 6
- Step 2: dc into the 4th ch from the hook.
- Step 3: Work a dc into the next 2 ch.
- Step 4: Ch 6
- Step 5: Work a dc into the 4th ch from the hook and in each of the next 2 ch.
- Step 6: Slip stitch into the 3rd dc stitch to join the two blocks together OR some people prefer to slip stitch into the turning chain or turning chain space to join. It really is a preference, do what you like best…each way of joining will look very similar. Just be sure as you’re doing all of this the tail (from where you began) is facing downward. You might have to turn it a bit to get it in the right spot.
- Step 7: Ch 3
- Step 8: Work 3 dc into the turning chain space.
- Repeat steps 4 through 8 to complete the first half of your blanket, using roughly half of your yarn. If you need to see more rows, I work a few more in the video also!
Part Two: The Blanket Decrease
- Step 1: When finished working the row, turn your work.
- Step 2: Work a slip stitch in each of the next three dc. (see tip below for changing colors on a new row)
- Step 3: Work a slip stitch into the turning chain space.
- Step 4: Ch 3
- Step 5: Work 3 dc into the turning chain space.
- Step 6: Slip stitch into the 3rd dc stitch to join the two blocks together OR some people prefer to slip stitch into the turning chain or turning chain space to join. It really is a preference, do what you like best…each way of joining will look very similar. Just be sure as you’re doing all of this the tail (from where you began) is facing downward. You might have to turn it a bit to get it in the right spot.
- Step 7: Ch 3
- Step 8: Work 3 dc into the turning chain space.
- Repeat steps 4 through 8 to complete the remainder of your row. When you begin a new row, begin at step one again. As you decrease, you will eliminate a block from each row.
*Quick color change tip! To keep stripes of color neat looking, change your yarn color AFTER step 2 of each row. See video to see this tip in action!
Finishing & Assembly:
- Trim fringe neatly across, weave in any ends and add tassels or pom poms to each blanket corner if you like! If you’ve never made a tassel, check out the video too.
Video Tutorial Series:
Here is a four part video series walking you through each part of this blanket step by step!
Starting with Week 1: Introduction to the project, sizing, and supplies:
On week 2, we learned how to do the c2c increase:
For week 3, we learned how to do the c2c decrease:


Can you tell me where I can find the pattern ? Thank you 🙏